

Die cut vs kiss cut stickers: which to order
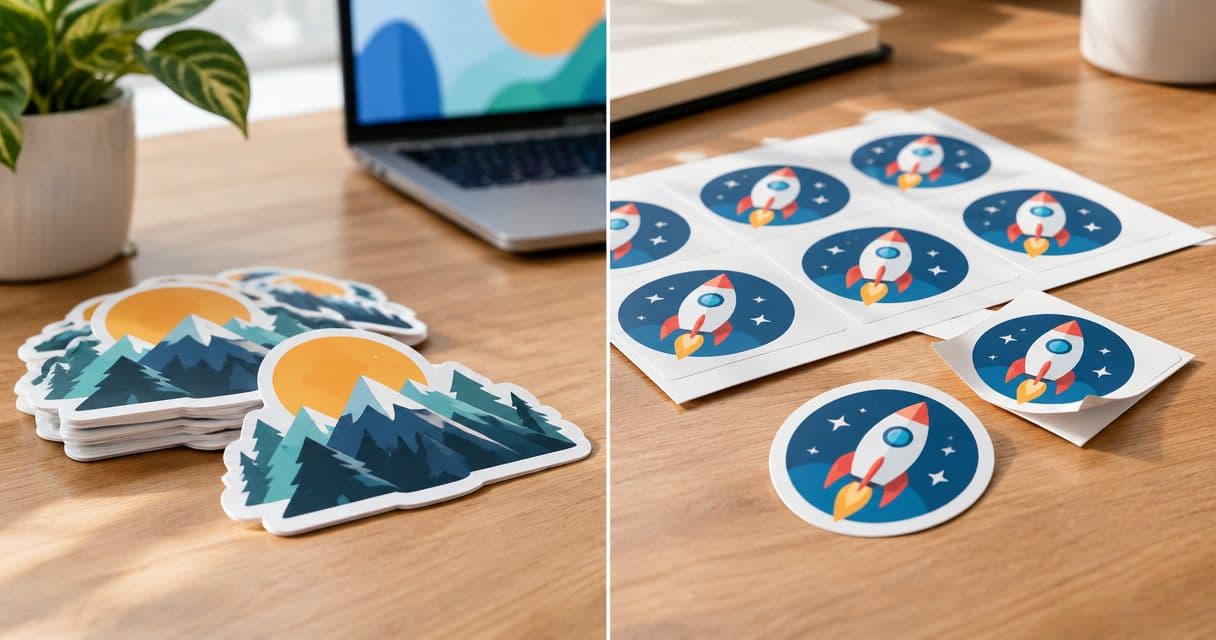
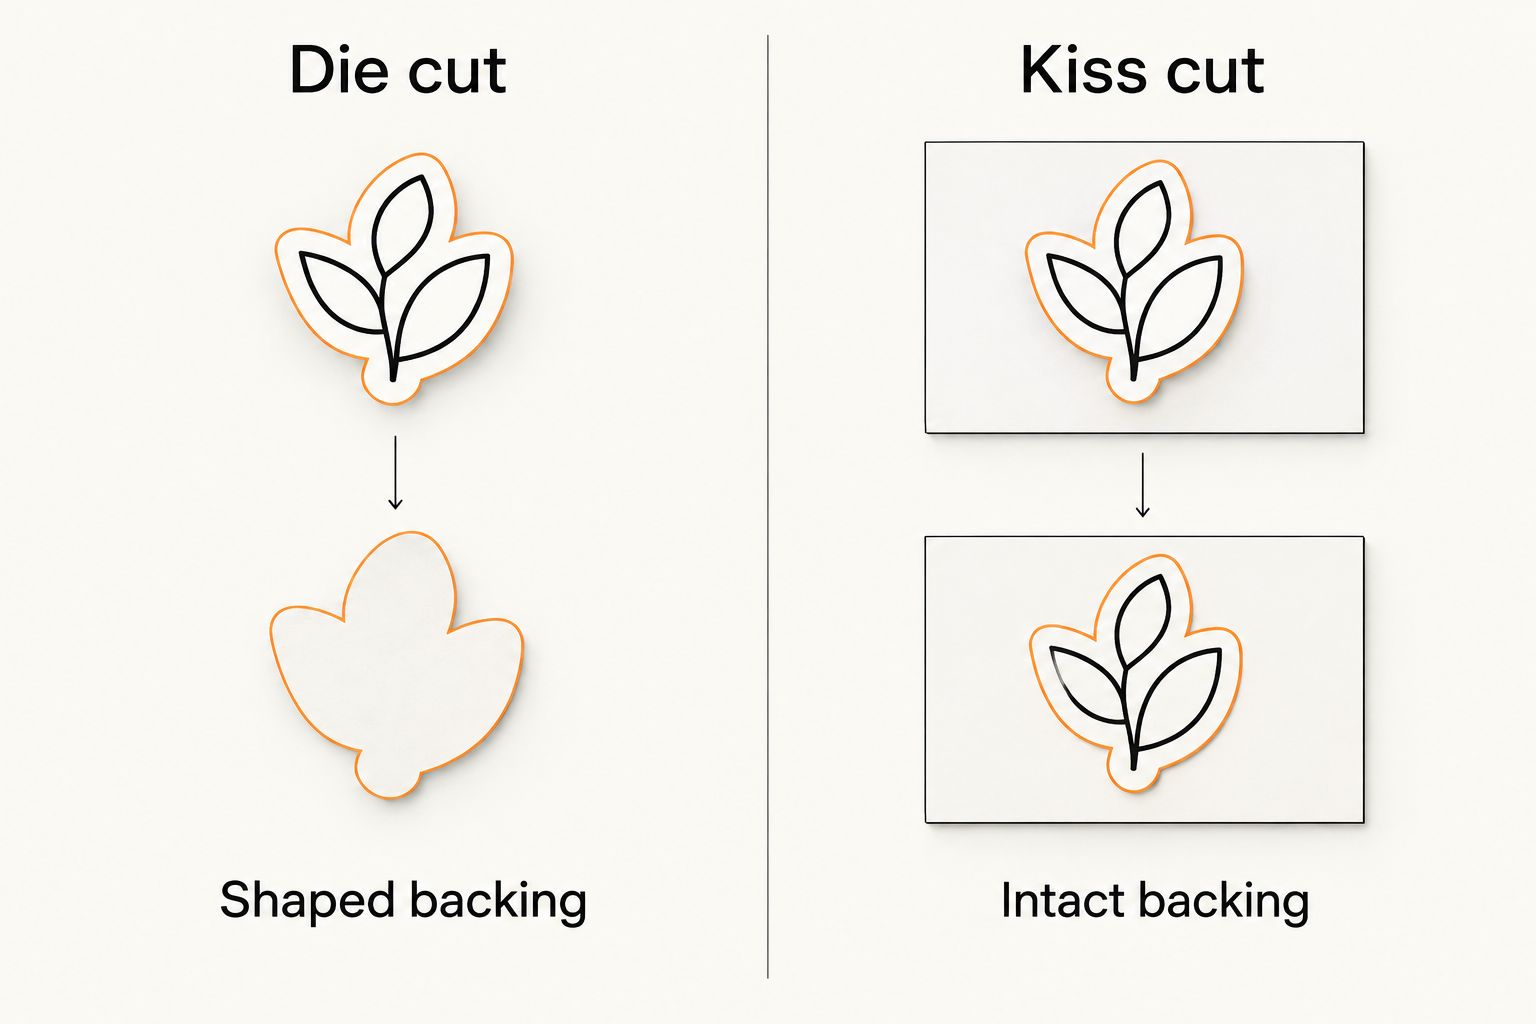
Choose die-cut stickers for individual logo giveaways and kiss-cut stickers when the surrounding backing helps you peel, organize, or present the design. In die cut vs kiss cut stickers, the main difference is what gets cut: die cutting follows the design through the sticker and liner, while kiss cutting leaves the liner intact; neither method alone determines print quality, finish, or adhesive performance.
- Die cut vs kiss cut stickers: choose by backing format and handling, not assumed print quality.
- Die-cut stickers suit individual logo giveaways; kiss-cut stickers retain surrounding backing for peeling or presentation.
- Vinylstatus serves small businesses ordering custom die-cut stickers from their own artwork.
- Check finished size, cut line, backing layout, and proof before approving a bulk order.
Why this matters
Your customer usually sees the printed sticker. Your staff also deals with the backing, peeling, sorting, storage, and application. Choose a format that works for both.
For a 2026 packaging order, start with the job rather than the shape you like on screen. A sticker handed across a counter has different handling needs from a label your team applies repeatedly to product boxes.
Vinylstatus is a fit for small businesses ordering custom die-cut stickers from their own artwork. If your order depends on a particular liner arrangement, confirm that arrangement before approving the proof; the artwork outline does not establish how the backing will arrive.
Die cut vs kiss cut stickers: which should you order?
Order die cut when the individually shaped sticker is part of the presentation. Order kiss cut when you want the design to remain on a larger, uncut liner until application. Both methods can follow a custom artwork outline.
| Ordering question | Die cut | Kiss cut |
|---|---|---|
| What gets cut? | Sticker material and backing liner | Sticker material, leaving the backing liner intact |
| What does the recipient handle? | An individual piece shaped around the design | A design retained on surrounding backing |
| Best for | Individual logo giveaways and loose handouts | Backing-supported presentation and organized application |
| Main advantage | The loose piece follows the artwork outline | Surrounding liner remains available to hold while peeling |
| Main limitation | Small or intricate outlines need careful handling | Extra backing adds material around the finished design |
| What needs confirmation? | Cut path, border, and peeling arrangement | Cut path, backing dimensions, and layout |
Kiss cutting describes the depth of the cut, not the number of stickers in an order. A kiss-cut design can sit on an individual backing card or share a sheet with other designs, depending on the ordered format.
Likewise, die cut does not mean borderless. A die-cut sticker can have a visible border around the artwork, with the cut following the outside of that border.
Die-cut stickers: best for individual giveaways
Die-cut stickers work when you want each loose piece to follow your logo or illustration. The outline becomes part of what the recipient sees before peeling.
For a small business, that suits counter handouts, event giveaways, and stickers tucked into customer orders. A simple silhouette also gives staff a recognizable piece to sort and distribute.
The trade-off is handling. A tiny projection, narrow connecting section, or complicated edge deserves attention before you approve the cut path. Those details can make the piece awkward to handle even when the artwork looks good enlarged on a monitor.
Choose die cut for the shaped handout, not because you expect a different adhesive or sharper print. Compare those specifications separately. For your 2026 order, record the actual finished sticker dimensions rather than relying on the size of the uploaded artwork canvas.
Kiss-cut stickers: best for backing-supported handling
Kiss-cut stickers keep the design on an intact liner. The surrounding backing gives you somewhere to hold the piece while lifting the sticker.
That format suits a presentation where the backing matters, or an application workflow where designs need to stay together until use. If multiple designs share a sheet, the layout can also keep a set organized.
The limitation is the extra area around the sticker. A backing card can take up more room than the peeled design, so check its dimensions against your packaging insert or storage space.
Choose kiss cut when the retained liner solves a handling or presentation problem. Do not assume every kiss-cut order includes a printed backing card, a multi-design sheet, or a particular arrangement. Those are separate ordering details.
Why the right sticker cut varies
The better choice depends on what happens between unpacking the order and applying the sticker. Use these factors to decide:
- Distribution: Loose giveaways favor a self-contained piece. A retained backing can suit an insert or organized set.
- Application: Staff applying packaging stickers need a format they can hold, peel, and position comfortably.
- Artwork outline: Thin projections and tight corners need closer cut-path review than a simple silhouette.
- Placement: A narrow box panel or curved container limits the usable sticker area, regardless of cutting method.
- Backing needs: A larger liner helps only if you have room for it and a reason to keep it.
- Peeling arrangement: A split-back liner and a kiss-cut edge are different features. Check the actual liner specification.
Neither cutting method fixes an unsuitable size or cluttered logo. Resolve the design and placement first, then choose the backing format that supports the job.
How to prepare a bulk sticker order
A useful 2026 order starts with the application surface and ends with an approved proof. Keep those decisions in that order so an attractive screen preview does not override a practical packaging requirement.
Start with the placement
Put a paper mockup on the actual box, bag, jar, or giveaway surface. Check the available flat area, nearby folds, opening tabs, and other printed information.
For packaging, decide whether the sticker identifies the product, decorates the package, or crosses a closure. Those are different jobs. Do not assume a decorative sticker is a tamper-evident seal.
Separate sticker size from backing size
Write down the dimensions of the peeled sticker and, where relevant, the dimensions of the backing. A design that fits your box can still arrive on a liner that does not fit your planned insert.
Check which dimensions the order selector describes. With custom-shaped artwork, a wide logo and a tall logo occupy space differently even when their longest dimensions match.
Review the artwork outline
Inspect the proposed cut line rather than judging only the printed image. Look for narrow tips, small notches, isolated details, and areas where the border becomes uneven.
Simplify the outline when a detail adds handling difficulty without helping recognition. Keep essential text and artwork comfortably inside the intended cut boundary, following the printer's supplied artwork requirements.
Choose finish separately
Matte and glossy describe surface finish; die cut and kiss cut describe cutting. Keep those decisions separate when reviewing an order.
Consider glare, the appearance of your artwork, and the application setting when choosing a finish. Do not use the cutting method as shorthand for water resistance, outdoor suitability, or removability; check the stated material and adhesive specifications instead.
Approve the proof, then schedule
Use the proof stage to check size, orientation, border, cut path, and any shown backing layout. Free online proofs and human artwork checks help resolve these questions before printing; read the proof rather than treating approval as an administrative step.
Keep production after proof approval separate from shipping time when planning your deadline. If a packaging launch depends on the stickers, allow for artwork revisions before you approve production rather than scheduling from the upload date alone.
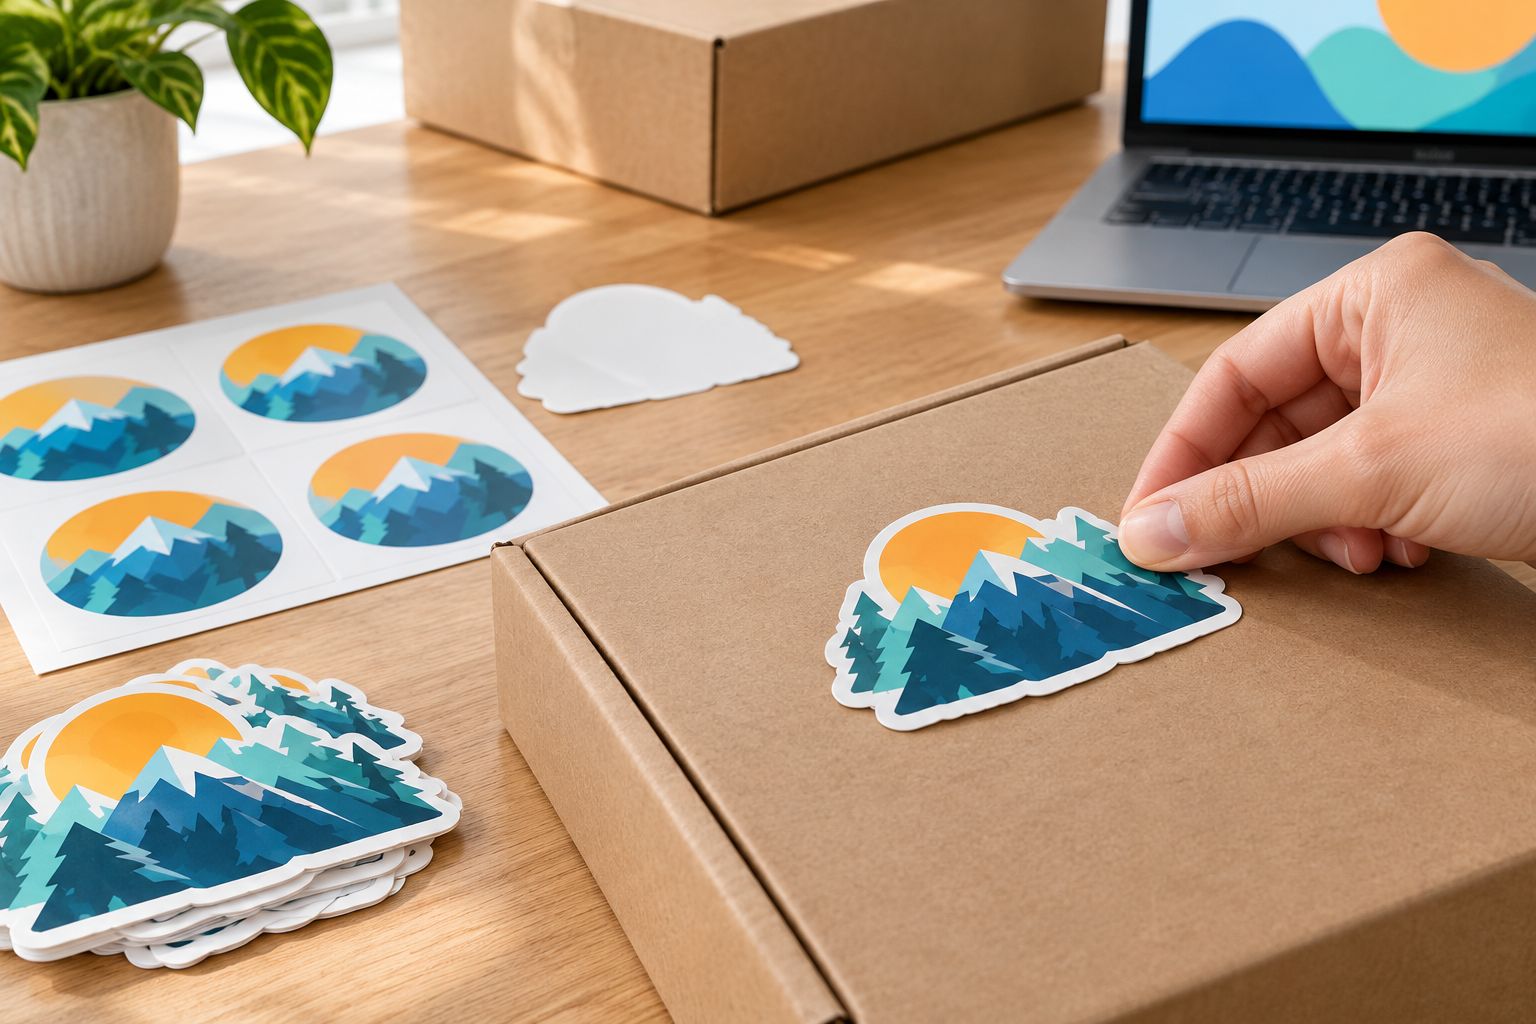
How should you calculate a useful bulk quantity?
Base your 2026 sticker quantity on a defined use: packaging applications, planned handouts, or both. Keep those uses separate so an event giveaway does not consume the labels needed for customer orders.
Use this ordering worksheet:
- Packaging demand: Count the packages that actually need the sticker during the purchasing period.
- Giveaway demand: Assign a separate quantity to events, counter distribution, or order inserts.
- Working allowance: Decide explicitly what you need for application mistakes, samples, and internal use.
- Design stability: Check whether contact details, campaign artwork, or packaging dimensions will change before the stickers are used.
Compare the total order commitment with that demand, not just the unit figure displayed at a larger quantity. Unused stickers are still unused inventory, even when the per-piece calculation looks attractive.
Vinylstatus custom stickers should be ordered around a real placement and distribution plan. Keep your approved artwork, dimensions, and order notes together so a reorder does not depend on someone's memory.
Is kiss cut easier to peel than die cut?
Kiss cut provides surrounding liner to hold, but cutting method alone does not establish peeling ease. A die-cut sticker with a specified split-back liner offers a different way to access the adhesive side.
For repeated packaging work, check the liner arrangement alongside the sticker shape. Avoid choosing a format solely from a photo of the printed face, because that view does not show how your staff will start the peel.
Will my logo look different after the sticker is applied?
The cutting method alone does not change the peeled logo's appearance. If the artwork, finished outline, border, material, and finish match, the backing difference disappears once the liner is removed.
Compare the finished sticker specifications rather than the unpeeled presentation. A larger backing card can make a kiss-cut example look larger in a product image without increasing the applied design size.
FAQ
What’s the main difference between die cut and kiss cut stickers?
Die-cut stickers are cut through the sticker material and backing; kiss-cut stickers are cut through the sticker material while leaving the liner intact. Compare backing format and handling separately from print, finish, and adhesive specifications.
Which sticker cut should I choose for logo giveaways?
Die cut suits individual logo giveaways when you want the loose piece to follow the artwork outline. Choose kiss cut instead when the surrounding backing serves a specific presentation or handling purpose.
Are kiss-cut stickers always supplied on sheets?
No. Kiss cutting describes a cut that leaves the liner intact, not a required sheet format. Confirm whether your order uses individual backing pieces or a shared sheet.
Can die-cut stickers have a white border?
Yes. A die-cut sticker can include a visible border, with the cut following the outside of that border. Check the border and cut line together on the proof.
Does die cut mean a sticker is waterproof?
No. Die cut describes how the sticker and liner are cut, not water resistance. Check the product’s material and performance specifications for the intended application.
Does kiss cut mean the backing has a split?
No. Kiss cutting leaves the liner intact, while a split-back liner has a separate feature that helps you access the adhesive side. Confirm the liner specification rather than inferring it from the cutting method.
What should I check before approving a custom sticker proof?
Check the finished dimensions, artwork orientation, cut path, border, and any shown backing layout. For a Vinylstatus custom sticker order, resolve questions about the intended packaging or giveaway use before approval.
One last thing
Compare the stickers after peeling, not just as they arrive. The larger liner around a kiss-cut design is temporary; your customer sees the applied artwork, while your team handles the backing.
For your next 2026 bulk order, keep a placement mockup with the approved proof. That gives the person ordering and the person applying the stickers the same reference—and keeps the cutting decision tied to the job.